WireGuard VPN Gateway
Design
The goal of this project was to create a secure method of remotely accessing my homelab without exposing internal systems, such as my DNS sinkhole, to the public Internet. Exposing services directly introduces unnecessary attack surface, so I needed a way to consolidate inbound access into a single hardened entry point.
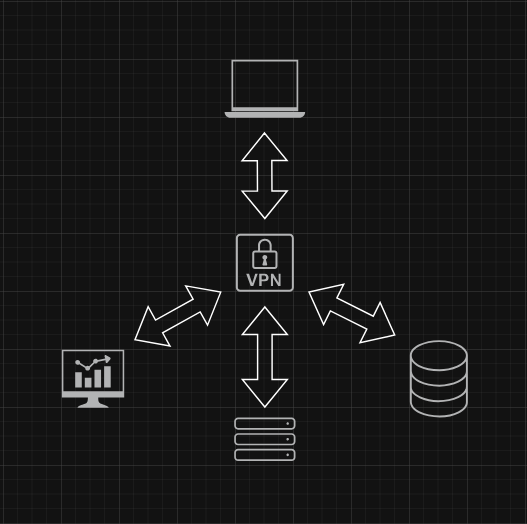
I chose to host a WireGuard VPN on my existing C2 server. This approach let me leverage a machine already positioned as a central control node, turning it into a dual-purpose gateway. WireGuard was selected for its lightweight design, modern cryptography, ease of setup, and strong community support.
Development
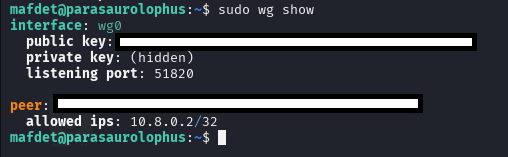
I began by installing WireGuard on the C2 server (Raspberry Pi 3). I generated server and client key pairs, configured a private subnet (10.8.0.0/24), and created iptables/NAT rules to allow VPN peers to reach my LAN.

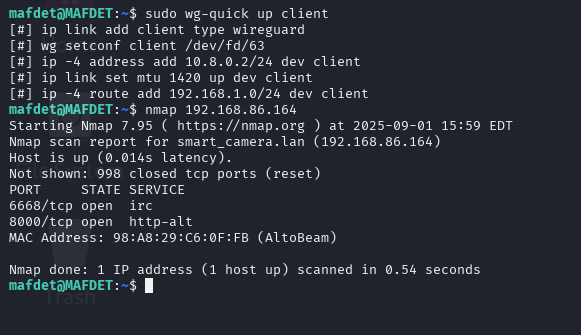
Testing was conducted from my Kali laptop over a mobile hotspot. Once connected, I was able to successfully ping both external addresses (e.g., 8.8.8.8) and internal hosts such as my sinkhole, proving full tunnel functionality.
Deployment
The final VPN deployment runs directly on my C2 server, acting as the secure gateway into my homelab. All inbound access is now funneled through this VPN tunnel rather than exposing multiple ports or services directly to the Internet.
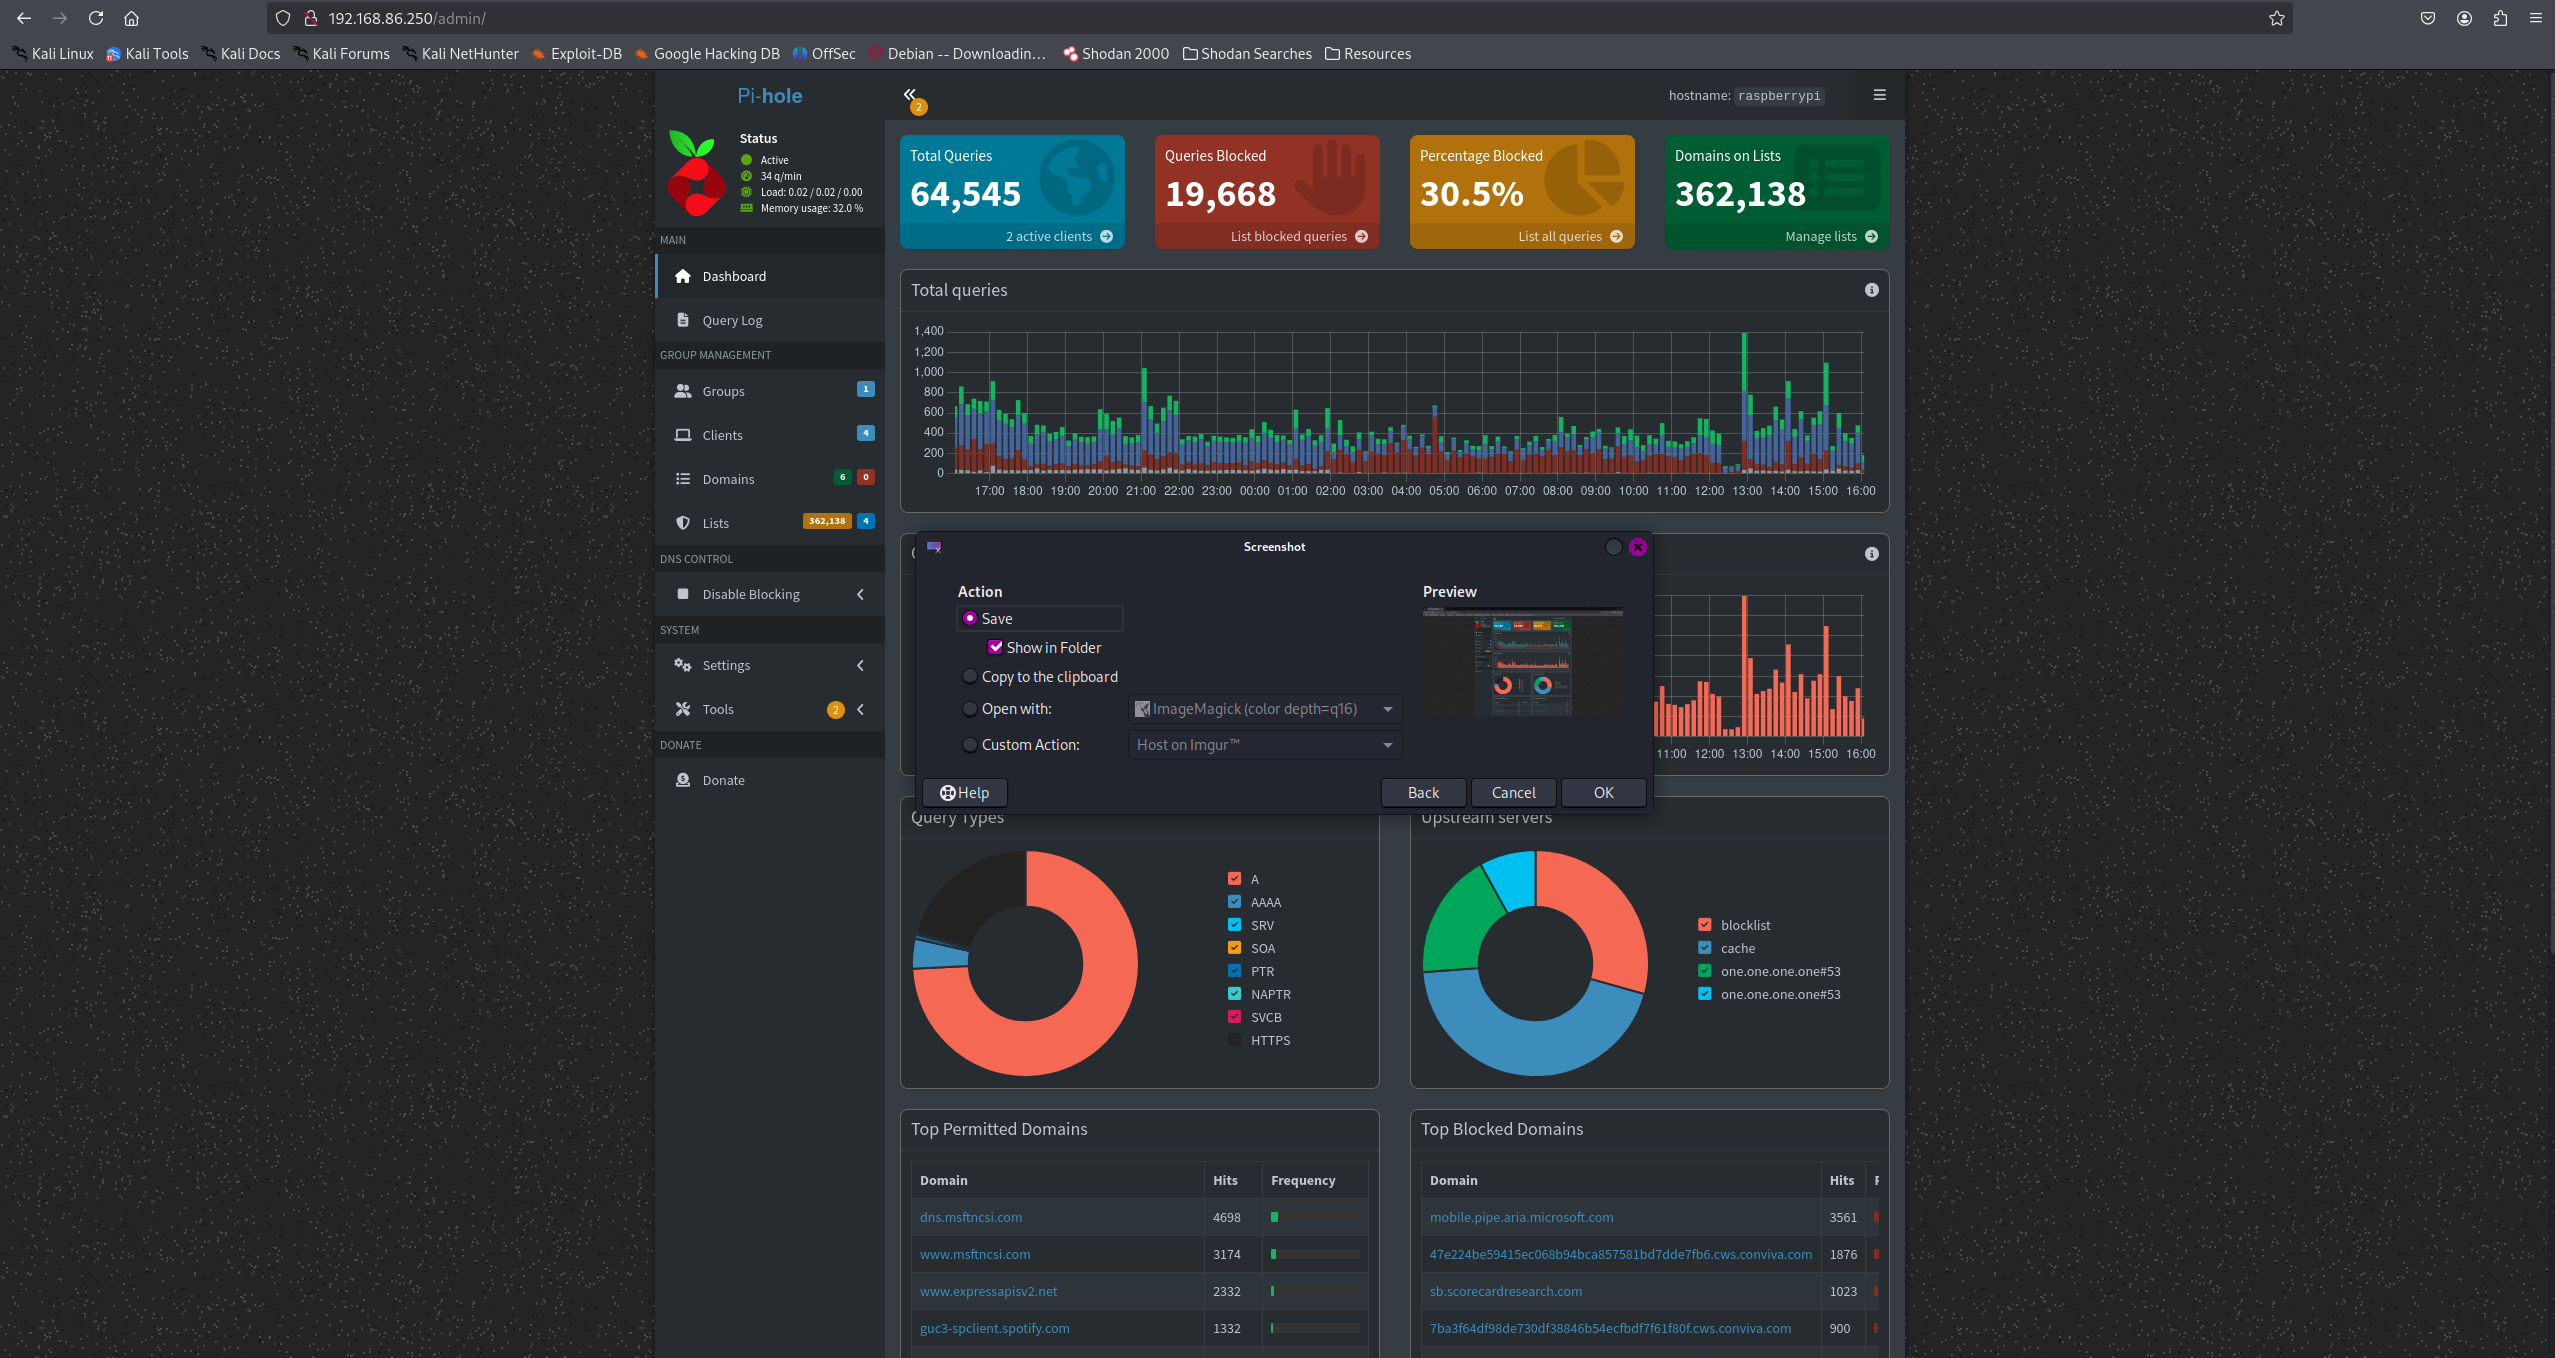
With this in place, I can connect from anywhere and securely reach my internal resources, such as the Pi-hole dashboard on the sinkhole. Externally, only the WireGuard port is visible, greatly reducing attack surface.
Lessons Learned
- VPN consolidation effectively hides internal services from direct exposure.
- Gained hands-on experience configuring WireGuard, NAT, firewall rules, and routing.
- Writing scripts to handle peer management and monitoring saves time and improves consistency.
- Learned how VPNs strengthen defenses, but also how attackers could abuse them to hide C2 traffic — and what metadata defenders could still monitor.